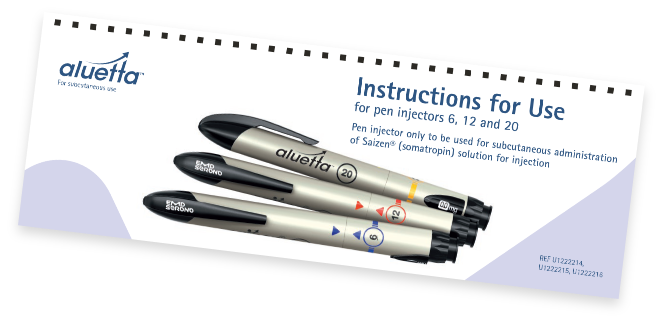
How to use aluetta
TRAINING VIDEO: Preparing for an injection with aluetta
If you are new to aluetta or would like to refresh your training, watch the video to learn more.
Step-by-step instructions on how to get started with aluetta
For your convenience, we have a step-by-step guide on how to get started with aluetta.
There are easy-to-follow pictures to help you at each step.
For your convenience, you can download a PDF version of the Instructions for Use booklet that was also given to you in the aluetta box.
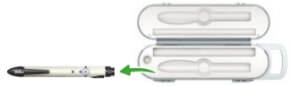
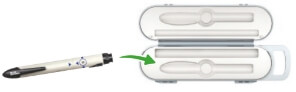
a. Gather a needle and the aluetta pen injector carton. Take out a new cartridge (Figure 1.1a).
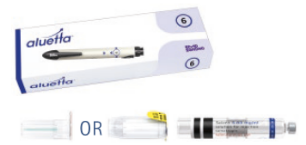
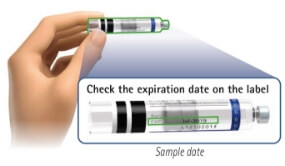
b. When using the aluetta pen injector for the first time, write the date you first use it and the expiration date on the label on the back of the storage box or the instructions booklet (Figure 1.1b).

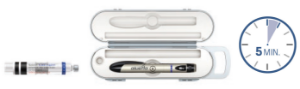
If stored in the refrigerator, open the storage box and wait five minutes for the medicine to warm up.
Prepare a clean, flat surface, such as a table or countertop, in a well-lit area.
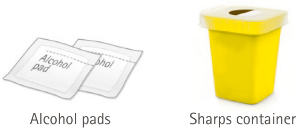
You will also need: alcohol pads and a sharps container. See Step 10.3, “Disposing of your used needles and empty cartridges,” for disposal instructions.
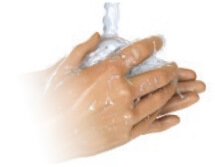
Wash your hands with soap and water, then dry them well.
Remove the aluetta pen injector from the storage box.
Confirm the label of the cartridge.
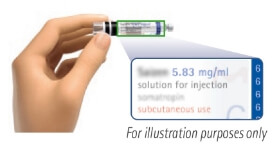
The aluetta pen injector and cartridge are available in 3 presentations: 6 mg, 12 mg, and 20 mg.

Confirm the cartridge is not damaged or cracked.
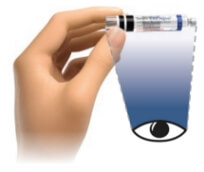
Confirm that the medicine:
- is clear
- is colourless
- does not contain particles
Confirm the expiration date on the cartridge has not passed.
Warning:
- Do not use the cartridge if it is damaged, or if the medicine is discoloured or cloudy.
- Do not use the cartridge if the expiration date on the cartridge has passed.
Doing so could cause an illness. Call your healthcare professional for questions.
When to insert a new cartridge:
- the first time you use the aluetta pen injector
- the cartridge is empty
- the cartridge has expired
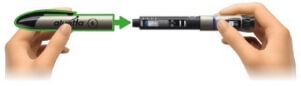
Pull the cap off the aluetta pen injector.
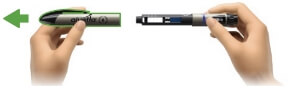
Twist and remove cartridge holder from pen injector body.
If the cartridge holder contains an empty or expired cartridge, remove and throw it away in a sharps disposal container.

For information on proper sharps disposal instructions, see Step 10.3, “Disposing of your used needles and empty cartridges.”
If the plunger is extended, hold the plunger return ring and rotate the pen injector body until you cannot turn it anymore. Make sure the plunger touches the dose sleeve.

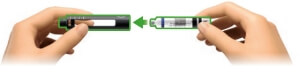
Hold cartridge holder and push a new cartridge in with metal cap first.
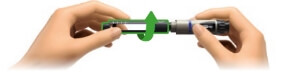
Line up pen injector body with cartridge holder and twist cartridge holder back onto pen injector body until you cannot twist it anymore.
The number (6, 12, or 20) printed on cartridge holder and pen injector body should line up.
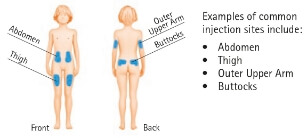
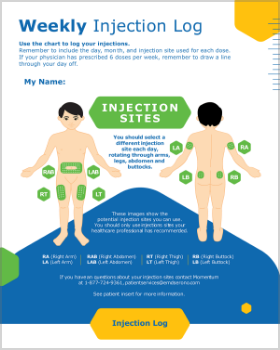
Note: Your healthcare professional should show you the injection sites to use.
Select a different injection site each time you inject to reduce redness, irritation, or other skin problems.
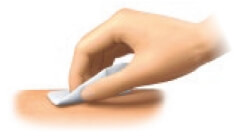
Prepare your injection site by wiping it with an alcohol pad; allow your skin to dry.
Note: Applies to Pencylcap, Ultra-FineTM, and AutoShield DUOTM needles.
Check the peel paper on the needle to make sure it is not broken and the expiry date has not passed.
Warning:
Do not use needle if peel paper is broken or the expiry date has passed. Doing so may cause an infection. Discard in your sharps container and get a new needle.
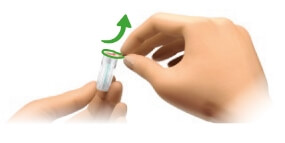
Peel off the peel paper from a new needle and discard paper in trash.
Hold needle straight and twist it onto the cartridge holder until you cannot twist it anymore.
Warning:
Do not remove the outer needle cover until ready to prime or inject.

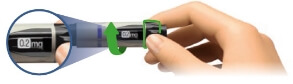
Turn the dose selection knob to 0.2 mg; the dose window will show “0.2.”
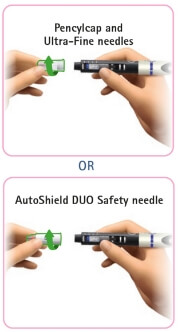
If you use the Pencylcap or Ultra-FineTM needles:
- Pull off outer needle cover and place it in the well of the storage box. You might need this again for removing the needle after the injection.
- Carefully pull off needle shield and discard it.
OR
If you use the AutoShield DUOTM Safety needle:
Pull off outer needle cover and discard in the trash.

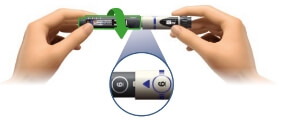
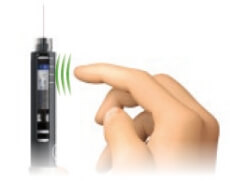
With the needle pointing up, gently tap the cartridge with your finger so that any air bubbles rise to the top.
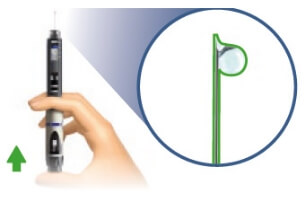
Continue holding the aluetta pen injector with needle pointing up. Push the dose injection button until it stops. A tiny drop(s) of liquid will appear at the tip of the needle.
Warning: Do not wipe the drop(s) from the needle after priming.
Important: If you do not see drop(s) of medication come out of the needle tip, repeat the priming steps up to 5 times.
If the problem continues after trying 5 times, remove the cartridge and call your healthcare professional.
Note: Always set your dose according to your prescription. Call your healthcare professional if you are unsure of the prescribed dose.
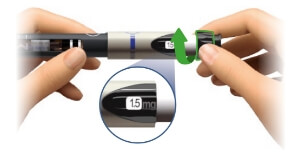
Turn the dose selection knob until your intended dose is visible in the dose window.
Using multiple cartridges to complete your prescribed dose:
If the dose selection knob does not turn to your prescribed dose, the cartridge does not have enough medication left. A new cartridge is required to deliver your full dose.
Follow Step 9, “Inject your dose,” to inject the first part of your prescribed dose and empty the cartridge. Use the dose amount of your first injection to calculate the remaining dose.
Proceed to Step 11, “How to store your aluetta pen injector,” to clean the cartridge holder.
When ready for the second injection, wash your hands again and take out a new cartridge.
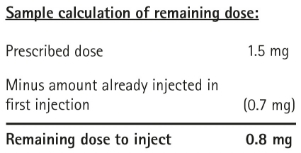
Calculate your remaining dose by subtracting the dose already injected from the prescribed dose – see sample calculation on the right.
To dial your dose, turn the dose knob until your intended dose is visible in the dose window.
Rotate injection site as instructed in Step 5.
Proceed from Step 9, “Inject your dose,” to inject the remaining dose.
Hold the aluetta pen injector at a 90° angle to the injection site.
Face the dose window towards you and then push the needle into your skin.

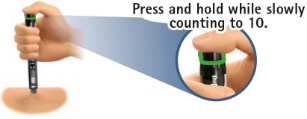
Use your thumb to press the injection button all the way in and hold it down while slowly counting to 10.
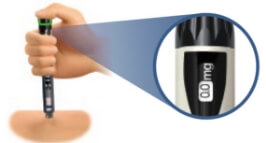
If the number “0.0” does not appear, press the injection button again and continue pressing until the number “0.0” appears.
Remove the needle from your skin and then release the injection button.
If you use the DUOTM Safety needle:
After injection, the protective sleeve locks automatically and you should see the red locking indicator.
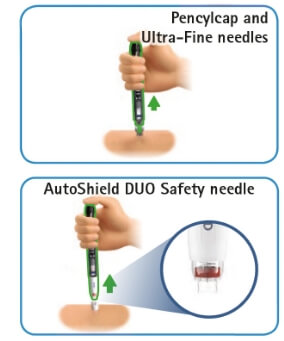
If you use the Pencylcap or Ultra-FineTM needles:
To help you recap the needle, push the aluetta pen injector into the outer needle cover in the well of the storage box until you cannot push it anymore.

For the Pencylcap, Ultra-FineTM, and AutoShield DUOTM Safety needles:
Hold the needle at the sides and twist it off to remove it from the aluetta pen injector.
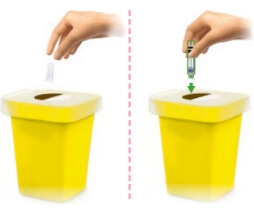
Disposing of your used needles and empty cartridges:
- Put your used needles and empty cartridges in a sharps disposal container right away after use. Do not throw away (dispose of) cartridges or needles in your household trash unless your community guidelines permit this.
- If you do not have a sharps disposal container, you may use a household container that is:
- made of a heavy-duty plastic,
- can be closed with a tight-fitting, puncture-resistant lid, without sharps being able to come out,
- upright and stable during use,
- leak-resistant, and
- properly labelled to warn of hazardous waste inside the container.
- When your sharps disposal container is almost full, you will need to follow your community guidelines for the right way to dispose of your sharps disposal container. There may be local laws about how you should throw away used needles and syringes.
- Do not recycle your used sharps disposal container.
After removing the needle, recap the aluetta pen injector.
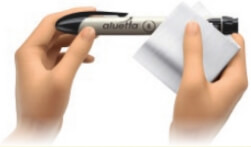
You can wipe the outside of the aluetta pen injector with a clean, damp cloth whenever needed.
You can also soak the empty cartridge holder in warm water for a few minutes, and then allow it to dry fully before reassembling the pen.
Caution:
- Do not immerse aluetta pen injector in water.
- Do not use any cleaning solutions, chemicals, or alcohol wipes.
Place the aluetta pen injector containing the cartridge in the storage box, and store it according to the Package Insert until next use.
How to track my aluetta injections
“I find it helpful to track my injection dates and different injection sites. I show this to my nurse and doctor at my appointments.”
Download the aluetta 24-week injection log today.

Talk to your doctor or nurse if you need more help tracking your injections.
Frequently asked questions
Please visit How to use aluetta to access a training video, step-by-step instructions, and an instruction booklet.
If you want more support, contact the Momentum Support Program. Momentum Nurses and Specialized Agents are available 24 hours/day, 7 days/week.
Phone: 1-877-724-9361.
Email: patientservices@emdserono.com.
Please contact the Momentum Support Program. Momentum Nurses and Specialized Agents are available 24 hours/day, 7 days/week.
Phone: 1-877-724-9361.
Email: patientservices@emdserono.com.
When this happens, this is called a partial injection. This means your cartridge does not have enough medicine for a full injection.
When this happens, you can make two partial injections.
To do this, wash your hands and attach a new needle. Next, turn the dose knob until you can’t turn it anymore.
Write down the number that you see displayed in the dose window. Then, do your first partial injection. After completing the injection, remove the needle by putting it in your sharps container, and throw away the empty cartridge.
To prepare for your second partial injection, choose a different part of your body to inject. Insert a new cartridge and attach a new needle. Remember that when you insert a new cartridge you will need to remove the air bubbles. Once you have finished removing the air bubbles from the new cartridge, calculate the dose of your second partial injection. To do that, subtract the number you wrote down from the number of your prescribed directed dose. The number you get is the remaining dose of your second partial injection.
If you are still having trouble, please contact the Momentum Support Program. Momentum Nurses and Specialized Agents are available 24 hours/day, 7 days/week.
Phone: 1-877-724-9361.
Email: patientservices@emdserono.com.
Go to Free Supplies to order the items you need.
As part of the Momentum Support Program, our Nurses and Specialized Agents can help you with insurance, reimbursement, and financial assistance. Learn more.
easypod is a growth hormone autoinjector that can also track your growth hormone injections. Learn more at easypod.ca.